Lexar USB Drive Data Recovery: Retrieve Your Lost Files in No Time
- Proficient data recovery tool that can recover deleted & lost files from formatted, corupted, and deleted Lexar USB drives
- It recovers images, videos, music, document files etc. from all other USB drives
- Available for free download that recovers all your files, and allows a free preview of the recovered files even before activation of the software
- Click on the below download button to get the free version of the software & retrieve all your files back in just three clicks
Lexar is a well know brand for producing a new generation of USB drives with high storage capacity and remarkable data transfer speed. These portable storage devices are durable and easily compatible with different devices. Though these USB dives boast of retaining data for a long time but, the fact is, these cannot be trusted completely. The USB drive is easily shared and a minor mistake, while its use, may result in a data loss. So, user should know how to recover data from a Lexar USB drive in order to retain their important data. It is the finest approach to secure valuable information on Lexar Professional cards and USB drives after any data loss crisis.
Circumstances under which files get deleted & lost from Lexar USB drives!
- Since USB drive is a kind of removable media, when the user deletes files from this drive, deleted files bypass the Recycle Bin or Trash. So when you delete any file make sure it will not be required in the future.
- You may encounter format error as the drive is inserted to the system. If you proceed to format the drive, it will get empty and you will lose the entire data. Dont worry! you have a good chance to recover formatted Lexar card and USB drive with a professional application.
- A Often users do a common mistake in hurry or habitually. Yes, most of us eject USB drive without disconnecting it properly. Removing USB drive during it is in use may cause in corrupted USB drive or loss or files. Moreover, with the help of this software you can restore data from Lexar CFast card with great ease.
- Using USB drive in many devices may result in the corrupted file system or virus attack and then you left with inaccessible or corrupted drive.
After you encounter a data loss on USB drive, it is necessary to go ahead for Lexar USB flash drive data recovery with an excellent tool. An important fact that we should keep in our mind soon after data loss happened is, stopping the act of saving files further on the drive. Until the older files are not overwritten, you have a strong opportunity to recover data from a Lexar USB drive.
Lexar Card Recovery - A free software to recover files from Lexar USB drive
Lexar Card Recovery application has a powerful drive scanning feature to identify kinds of files and retrieve files from Lexar card within no time. A user friendly application which offers safe and easy data recovery features to recover data from formatted SD card as well as from corrupted, damaged or inaccessible USB drives, microSD, CF, SDHC and other Lexar cards on all latest versions of Windows and Macintosh machines. The users can have a preview of the recovered files and easily evaluate the recovery result of the software. It is risk free and non-destructive application that does not modify or change any information while recovering files. The user has to make only a few clicks on software wizard and it will perform a USB drive data recovery automatically.
The Lexar Recovery Software is effective on all Lexar USB Drives including the ones mentioned below-
- Lexar® JumpDrive® P30 USB 3.2 Gen 1 Flash Drive
- Lexar® JumpDrive® Dual Drive E32c USB 3.2 Gen 1 Type-C™
- Lexar® JumpDrive® M900 USB 3.2 Gen 1 Flash Drive
- Lexar® JumpDrive® Fingerprint F35 PRO USB 3.2 Gen 1 Flash Drive
- Lexar® JumpDrive® S47 USB 3.2 Gen 1 Flash Drive
- Lexar® JumpDrive® M400 USB 3.2 Gen 1 Flash Drive
- Lexar® JumpDrive® S80 USB 3.2 Gen 1 Flash Drive
Step-by step guidelines to recover data from Lexar USB drive:
Step 1: Download Lexar Card Recovery tool and select the SD card under the External Drives section and Click on Scan to start recovering from a formatted SD card.
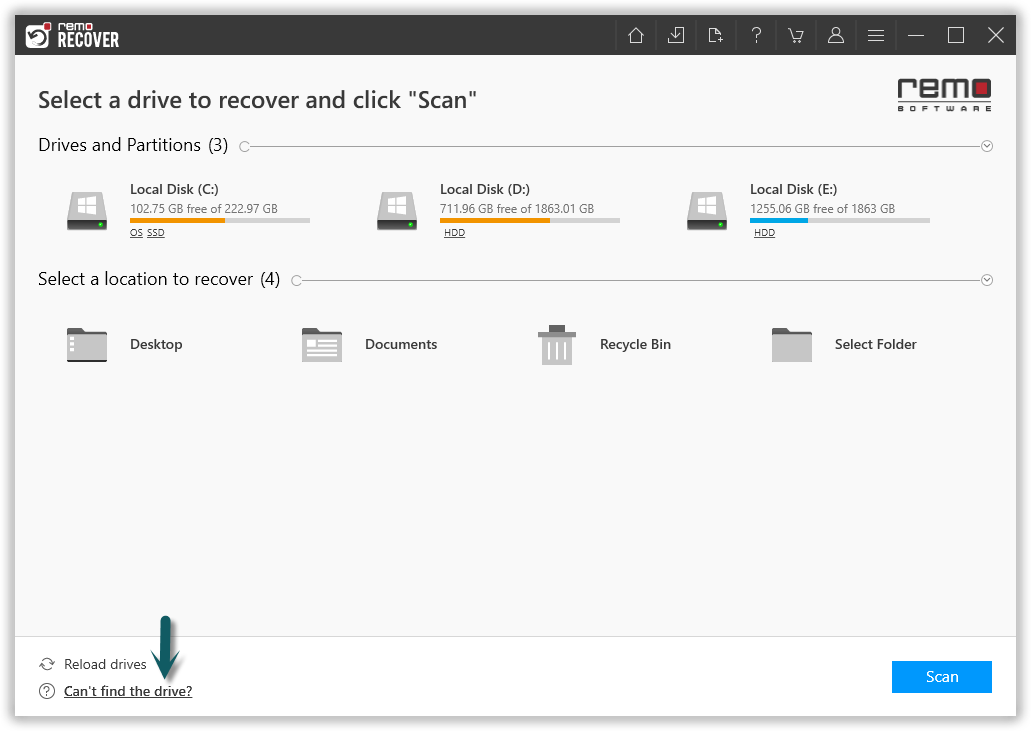
Figure 1: Main Screen
Note: Couldn’t locate your SD card? Click on Can't find the drive? this will show you the devices that were not visible on the Home window.
Step 2: The software will run Quick Scan , once scan is complete the tool will run the Deep Scan wherein it recovers data sector by sector of the drive. (Where you will be provided with Dynamic Recovery View) from which you can simultaneously recover data while the Deep Scan is running. Now select the folder or files that you want to recover from memory card and click on Recover.
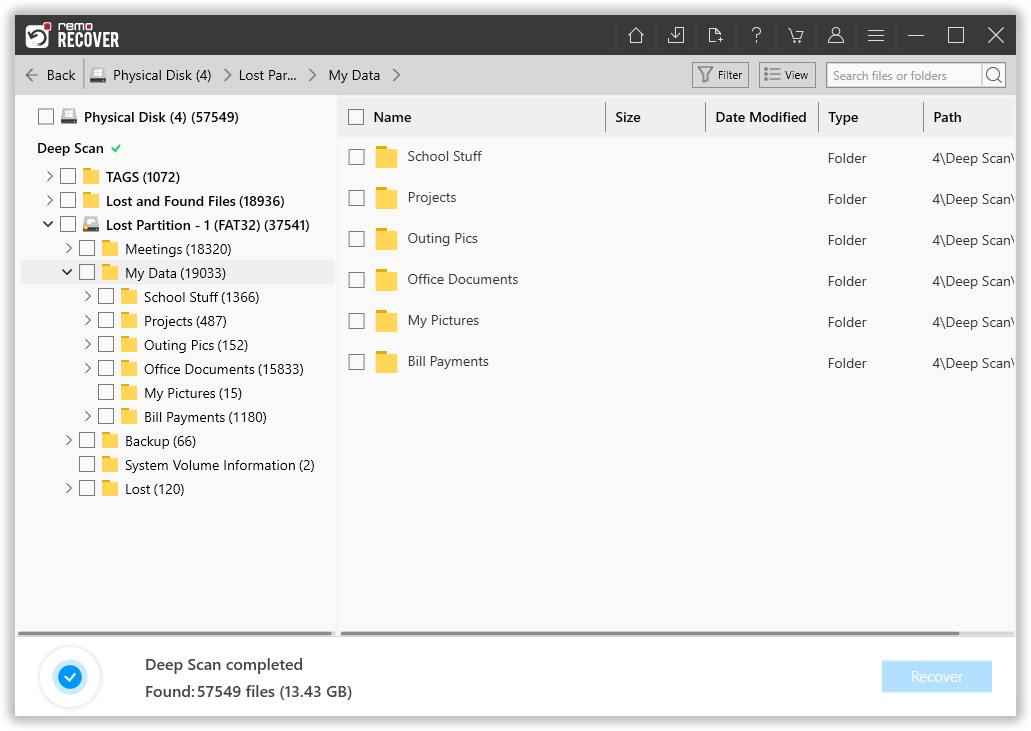
Figure 2: Recovered Files View
Step 3: You can go to any of these folders and double-click on any file to Preview the recovered files such as documents, PPTs, excel sheets, photos, or videos for free.
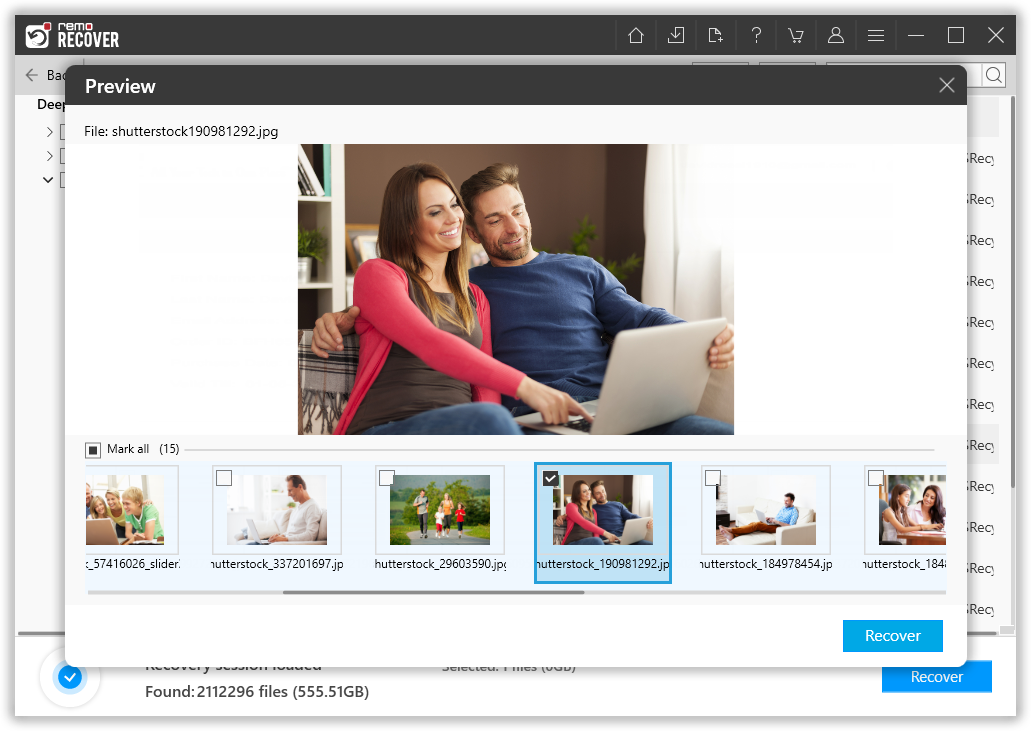
Figure 3: Preview Recovered Files
Step 4: After marking the essential files for restoration, select the destination location to Save the recovered files, as shown in below figure.
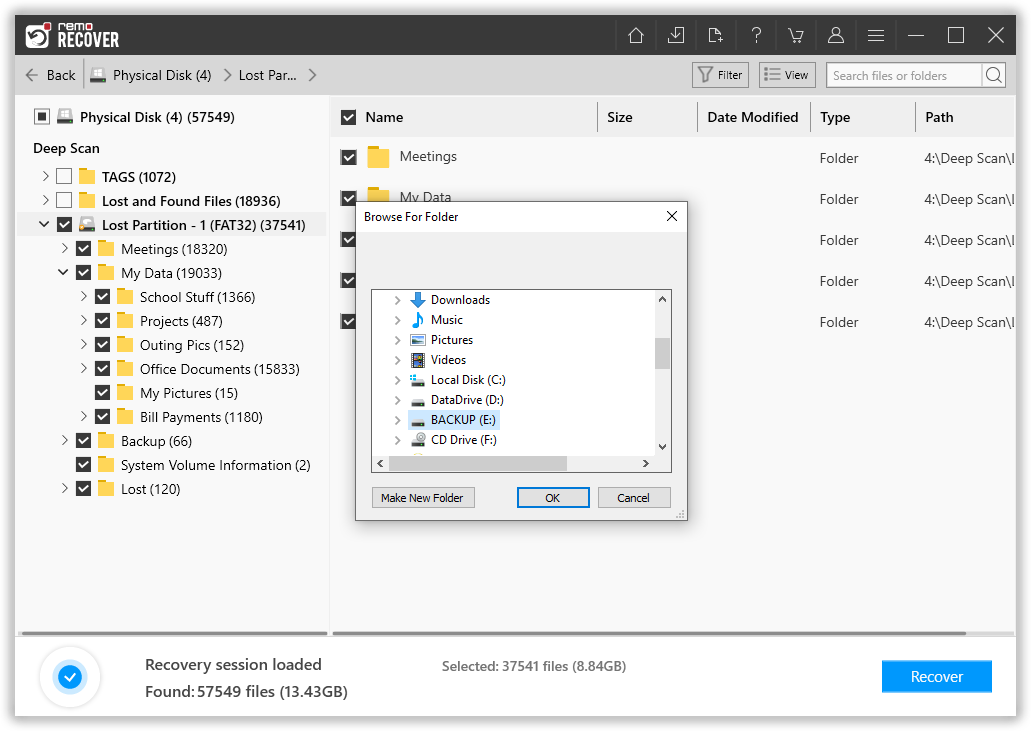
Figure 4: Save Recovered Files