Sony Memory Card SxS Data Recovery
- The highly reliable tool that restores media files from Sony SxS memory cards within clicks
- Can be used by any of other external storage drives to regain lost data
- Deleted, formatted, damaged or unreadable files can be recovered
- Safely brings back files without damaging the original file structure
The best approach to restoring data from a Sony SxS Card!
SxS (S by S) is a flash memory standard complimented to Sony and SanDisk – created Express Card standard. According to the SanDisk and Sony, the cards have reliable transfer rates and used as a storage medium for their XD CAM EX line of professional video cameras. However, sometimes due to the accidental formatting of Sony SxS card used in XD CAM EX camcorder connected to your PC via a card reader can result in severe data loss. In such undesirable situations, one should preserve a proper backup of essential data before facing any data loss scenarios. Nevertheless, due to carelessness or human mistakes unable to maintain a proper backup of your crucial data.
Then, stop feeling annoyed! Because there is an ultimate approach Sony Memory Card SxS Data Recovery tool to restore data from a Sony SxS card within a few mouse clicks. With the help of these advanced scanning algorithms, it is possible to perform rigorous scanning of Sony SxS memory card to get back deleted or lost files including photo file formats like JPEG, JPG, PNG etc, video file formats like AVI, MOV, MPEG, etc and audio file extension such as MP3, WAV, MIDI etc with ease. This software has the ability to restore data from the corrupt memory card of types SD card, SDHC, SDXC, CF card, xD card, etc of various manufacturing brands like Kingston, Transcend, Kingston, LaCie etc with great ease.
Common Reasons behind data loss from a Sony SxS Memory Card:
- Accidental Deletion: At times, while accessing data from SxS memory card or removing unwanted data, if you end up clicking on "Delete All" option can make you lose entire data within a few clicks. Moreover, you can use the Sony Memory Card SxS Data Recovery tool to restore deleted files from a Sony SxS card with ease.
- Virus Attacks: Whenever you connect the Sony SxS memory card to any virus-infected system or laptop can severely damage the file system of SxS memory card making the enitre data inaccessible.
- Abrupt Pulling of Sony SxS Card: Sometimes, while transferring or moving the data from SxS card to any other storage device, meanwhile if any sort of interruption like the sudden removal of SxS card can severely damage it making entire data inaccessible. To get over such crucial situations, simply make use of the Sony Memory Card SxS Data Recovery software with ease.
To overcome the above-mentioned Sony SxS card data loss scenarios, one should -
1. Maintain A Backup
keep a proper backup of essential data and never use or store any new data soon after facing data loss from Sony SxS card to prevent overwriting of existing data with newer ones.
2. Use Sony Memory Card SxS Data Recovery Utility
Employ the Sony Memory Card SxS Data Recovery utility to get back data from formatted or corrupt Sony SxS card
3. Sony Memory Card SxS Data Recovery Toolkit
Make use of Sony Memory Card SxS Data Recovery toolkit to restore lost data. It is compatible with the latest versions of Mac and Windows OS
Steps to undelete data from a Sony SxS Card:
Step 1: Install the Lexar Card Recovery application on your system and connect the Sony SxS card to the system. Launch this app and select "Recover Photos" option from the main screen as shown in fig A.
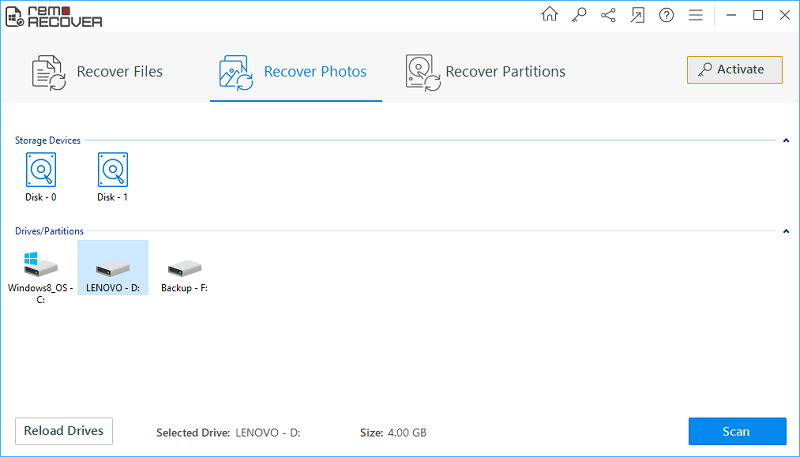
Fig A: Main Screen
Step 2: Now, choose the Sony SxS card from the displayed list of drives and click on next to initiate the scanning as shown in fig B.
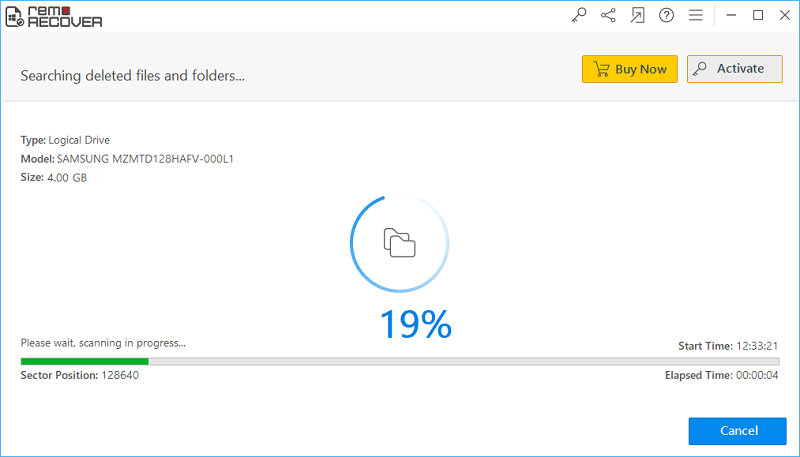
Fig B: Select Sony SxS Card
Step 3: Once the scanning is completed, the list of retrieved files will be displayed. Preview any recovered file with the Preview option as shown in fig C.
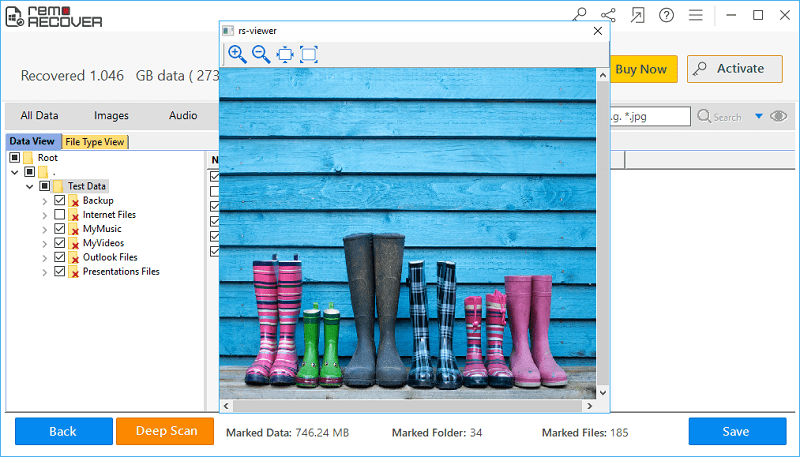
Fig C: Restored Files Preview