![]()
How to Recover Data from Lexar Jump Drive?
- The tremendous application that restores data from Lexar Jump Drives
- It is also capable to retrieve data from internal drives, external HDD, RAID drives, dynamic disks, SSD, USB drives and many more
- Provides very good support all disk file systems like FAT, NTFS, exFAT, HFS, HFS+ etc.
- The program can bring back images, videos, audio, documents and other files with ease
![]()
![]()
![]()
![]()
Easy Way to Recover Lexar Jump Drive Data
Lexar Jump Drive is one of the repeated used storage devices for either copying files from one location to another or create a backup of the crucial files and folders. Usage of devices like Lexar card has reduced the chances of manual error of misplacing files. But, although storage device like jump drive has numerous pros there are a few cons too. When we delete any of the files from the jump drive they are immediately lost. This is because of the fact that there is no availability of the Recycle Bin or Trash folder over jump drive that can give users a chance to restore back any of the deleted files. In case, if you are suffering from such kind of data loss scenario over jump drive then just make use of Lexar Card Recovery. This software scans the Lexar drive in a few minutes and performs Lexar jump drive data recovery with great efficiency.
Accidental Format: Formatting option available over any storage device allows users to wipe all of the files from the respective device. Such useful option if not used in an appropriate way can result in a severe data loss scenario over the Lexar card. If you got into similar kind of situation, then just make use of Lexar jump drive data recovery software as early as possible.
File System Corruption: The file system of any storage device is quite important, which manages each and every activity of jump drive. Hence, in case if your file system of the Lexar card is broken or corrupted then, each of the files that are saved over it would get unreachable.
Format Error: Format error can happen upon any of the USB drives. As this kind of error is reported on the screen, all the stored files over jump drive get unreachable or inaccessible. As this kind of data inaccessibility happen the users just format the drive and keep making use of the flash drive. But, instead of this users must always make use of any Lexar jump drive data recovery utility as early as possible.
Improper Ejection: The files that are saved over the Lexar jump drive can also get inaccessible because of an improper ejection. As this kind of mistake is performed by the user, chances of file system corruption are quite high.
Other Reasons: There are different other reasons for data loss from the Lexar jump drive, such as accidental deletion, deletion while previewing, error while making data transfer, etc.
All these data loss scenarios over Lexar jump drive can be easily handled by the implementation of Lexar jump drive data recovery software. You can make use of this promising software over different file systems such as NTFS, NTFS5, HFS+, HFS, FAT 16, FAT 32, and exFAT 64. As the scanning of the file is finished by this software, the users can easily check-out the files before saving them at destined location. In case if you are specifically looking for tool, which can be used to recover pictures from a Lexar card, then just make use of this software.
Note: In case if you have deleted or lost any of the files from the Lexar card on Mac system then make use of this link to know how to recover files from a Lexar card on Mac: https://www.lexarcardrecovery.com/media-software-for-mac.html
![]()
![]()
![]()
![]()
Simple Steps to Recover Files from a Lexar Jump Drive:
Step 1: First, download and install the Lexar Card Recovery software on your computer then select "Recover Photos" from the welcome screen as shown in fig A.
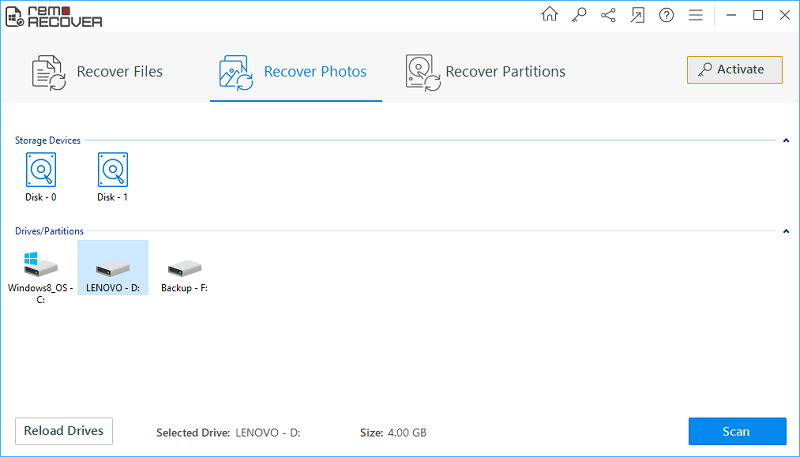
Fig A: Welcome Screen
Step 2: Insert the Lexr Jump Drive to PC then select the Lexar Jump Drive from the list of logical drives as shown in fig B.
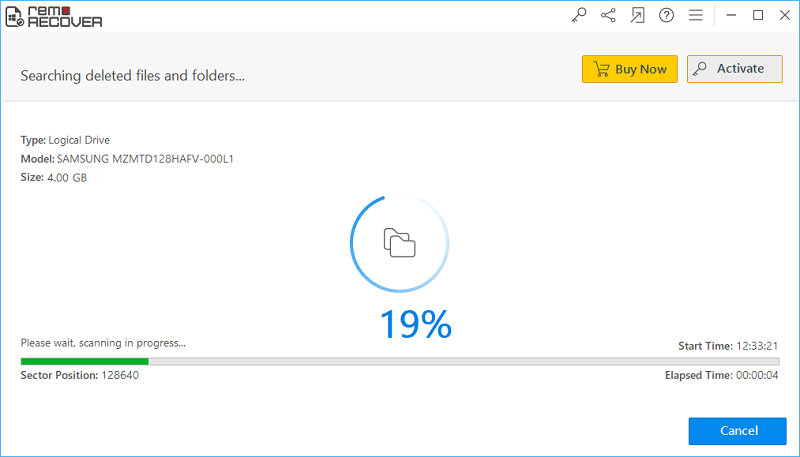
Fig B: Select Lexar Card
![]()
![]()
![]()
![]()
Step 3: The list of retrieved files after Lexar CF card recovery will be shown as in fig C.
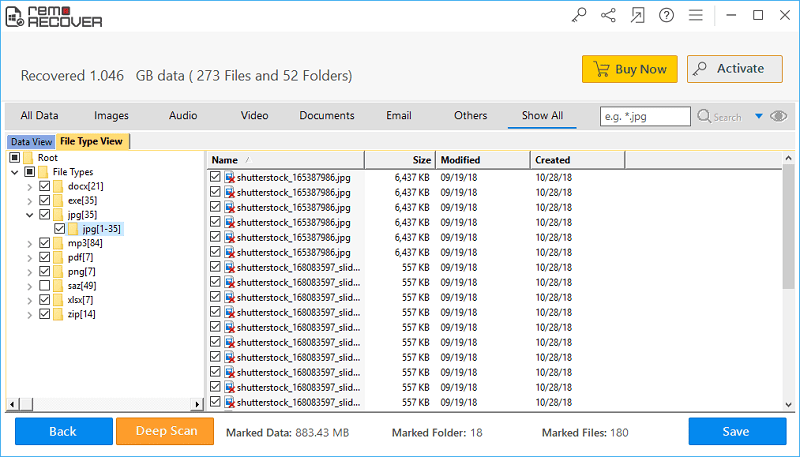
Fig C: Retrieved Files
Step 4: Finally, if preview the recovered files each one by one by just double-clicking on the file, as shown as in fig D.
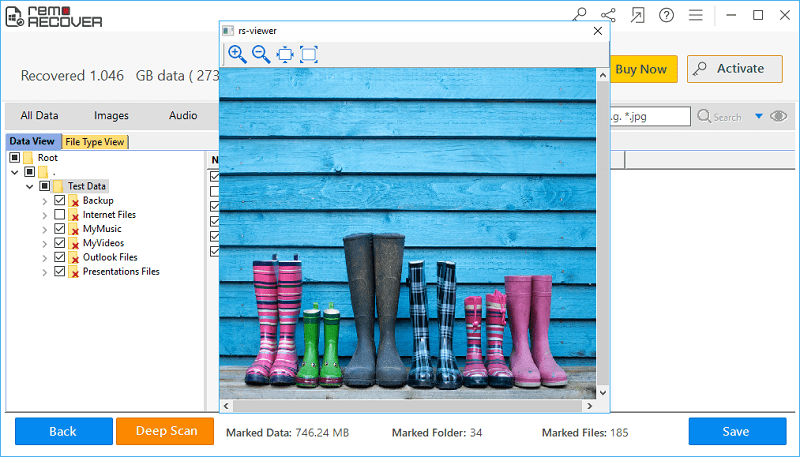
Fig D: Preview Retrieved Files
Step 5: After marking the essential files for restoration, select the destination location to save the recovered files, as shown in figure E.
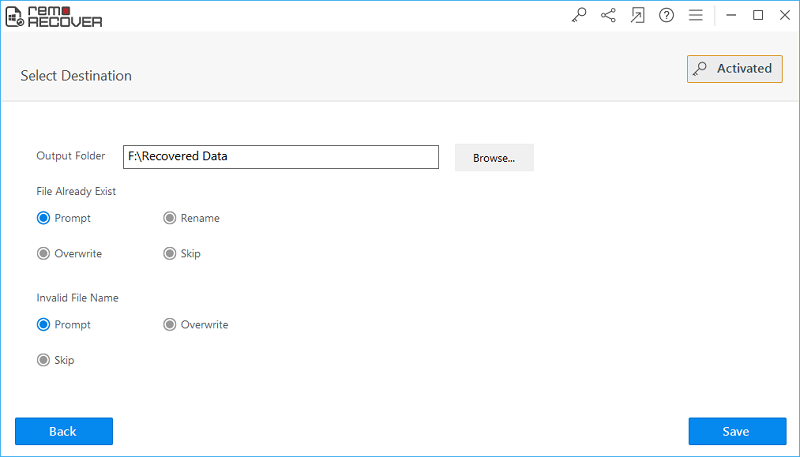
Fig E: Save Recovered Files
